Today is my husband's birthday and Saturday is our little guys birthday. Talk about a birthday week. I love birthdays and love to make a big fuss, unfortunately this year the fuss is going to have to wait. We'll be celebrating my husband's birthday tomorrow night. Complete with Tacos, the real kind & peanut butter pie.
This recipe was a favorite made by his grandmother growing up. It's easy to throw together and is a crowd pleaser.
Grandma Jean's Peanut Butter Pie
For a 9 inch pie
1 baked pie crust (you decide what you want to do. I tend to make my own, but store bought crusts work well too.)
1 large box vanilla pie filling
2 c. cold milk
1 container cool whip
1 c. chunky peanut butter
1 c. powdered sugar
Prepare your pie crust, make sure you prick the bottom of your crust with a fork and bake according to recipe you are using.
Once this is baked and cooled it's time for the filling. In a small bowl cut powdered sugar into crunchy peanut butter using a pastry blender. You may have to add a little more sugar, you'll want a crumbly consistency. Save 1/4 c. of this peanut butter sugar mixture and set aside. Pour the remaining in the bottom of your pie crust.
In a new bowl mix 1 large box pudding with 2 c. cold milk, then add 1/2 container of cool whip and mix well. Pour on top of peanut butter crumbs.
Allow to sit for several hours. Just before serving top with remaining cool whip and sprinkle the peanut butter crumb mixture you set aside. Enjoy!
For more great recipes check out the Recipe Swap on Friday.
Erica
Showing posts with label Recipes. Show all posts
Showing posts with label Recipes. Show all posts
Thursday, October 8, 2009
Thursday, September 3, 2009
Mexican Pot Roast-Crockpot Modifications
Oh my stars, this is a great recipe. I'm usually not a fan of pot roast, I have bad memories of the bland dry after church roast growing up. Mom I was thankful for it, and still am, but never really crave a roast.
Here is the original recipe. This is how I made it into a crockpot dish.
1 large can stewed or whole tomatoes (I just pulled out 5 frozen whole tomatoes covered them with water and microwaved them for several minutes. I drained some of the water, but left enough to cover them and them mashed them.)
Jalapeno Peppers to your liking (I added 5 and you could hardly taste them)
3 T. dry taco seasoning mix
1 chicken bouillon cube
1 c. boiling water
2 T. tomato paste
1 tsp garlic powder
1/2 onion chopped
1/2 t. Pepper
Wash your roast and add it to the bottom of the crockpot. Next heat your water and dissolve 1 bouillon cube, then add your 2 T. tomato paste and mix breaking up the paste. Pour this over your roast.
Add your can of stewed or whole tomatoes. I used frozen tomatoes so I had to heat those up so they could defrost. I poured off some of the water before I removed the skins. Then I smashed them. Pour this over the roast.
Add jalapenos, onion, taco seasoning and garlic powder and pepper to top of roast.
Add enough water to barely cover your roast then put the lid on. Cook on low for several hours. I cooked it on the low 10 hour setting. I served it with tortillas but it would be great over rice too.
Enjoy!
Erica
Here is the original recipe. This is how I made it into a crockpot dish.
Crockpot Mexican Pot Roast
4 lb. lean, boneless chuck pot roast (mine had a bone and I trimmed off some of the fat)1 large can stewed or whole tomatoes (I just pulled out 5 frozen whole tomatoes covered them with water and microwaved them for several minutes. I drained some of the water, but left enough to cover them and them mashed them.)
Jalapeno Peppers to your liking (I added 5 and you could hardly taste them)
3 T. dry taco seasoning mix
1 chicken bouillon cube
1 c. boiling water
2 T. tomato paste
1 tsp garlic powder
1/2 onion chopped
1/2 t. Pepper
Wash your roast and add it to the bottom of the crockpot. Next heat your water and dissolve 1 bouillon cube, then add your 2 T. tomato paste and mix breaking up the paste. Pour this over your roast.
Add your can of stewed or whole tomatoes. I used frozen tomatoes so I had to heat those up so they could defrost. I poured off some of the water before I removed the skins. Then I smashed them. Pour this over the roast.
Add jalapenos, onion, taco seasoning and garlic powder and pepper to top of roast.
Add enough water to barely cover your roast then put the lid on. Cook on low for several hours. I cooked it on the low 10 hour setting. I served it with tortillas but it would be great over rice too.
Enjoy!
Erica
Thursday, August 27, 2009
Preserving Summer's Bounty-Part 2 Canning Peaches
Oh my goodness have peaches just been amazing this year or what! My toddler has been in love and has requested peaches almost every morning for breakfast. I wanted to make sure we still had a few when they were no longer in season, so I decided to try canning a few. This is the first canning I had done by myself and I was little nervous. But it wasn't too bad and it was very satisfying hearing the pop of the seals once my work was complete.
you'll need:
Peaches
Canning Jars & lids (I used 12 lb. of peaches and it filled about 9 pint size jars)
Sugar
Water
or pineapple juice
Large Pot or Canning Pot
Something to lift your jars out of the water, they sell specific tools and chances are you know someone who has one.
First thing first is to get your water bath going. I don't have a canner so I used a large pot. Bring your water to a boil and add your jars using this cool little jar picker upper. Let these jars sterilize in the boiling water for about 10 minutes. Add your rings and lids for 5 minutes to not quite boiling water. Make sure you set a timer so you won't forget about them. If you have a dishwasher with a sterilize feature you can simply do this, unfortunately I don't.
 While those are sterilizing wash your peaches and boil another pot of water. Fill an additional bowl with COLD water, I added some ice cubes to make sure it was COLD.
 Drop several peaches into your boiling water for about 30-45 seconds.
 Then use a slotted spoon and add them to the cold water and let sit for about 2 minutes. This process shocks the peaches making them very easy to peel.
 Once you shock the peaches remove the skins. It's very important to let them sit for a few minutes in the cold water. Trust me if you try to peel them before this point you'll have problems. I finally figured this out 8 lbs. into peeling my peaches. The last 4 lbs. went much better. If you want to maximize the entire peach, save the peelings in a little bowl and make some peach honey with them later.
 Once you've peeled your peaches it's time to slice them as you desire. You can half them and remove the pit, slice them, or dice them it's up to you. I sliced them. Then add some lemon juice or Fresh Fruit over your peaches to prevent them from browning. Give it a good stir coating all your peaches.
 Now it's time to prepare your syrup or your juice you will pack your peaches in. Add 6 cups of water and bring it to a boil. Slowly add your sugar and bring to a boil then allow to barely boil for a few minutes, so you'll need to lower your heat.

Next you'll add your peaches to the barely boiling syrup and barely boil for 5 minutes.

Now you're ready to fill your jars. Use a nifty little canning funnel and you'll avoid some spills. Add your peaches to your jars and fill them tightly, leave about 1 inch to 1/2 inch of the jar unfilled. Once you've added your peaches. Make sure to cover them with syrup.
 Next run a knife or the little canning tool along the sides of your jars to release any air bubbles.

Wipe the lip and threads of the jar clean with a wet clean cloth and add your sterilized lids and tighten the ring on the jars.
Add filled and closed jars to a boiling hot water bath. You need enough boiling water to covers the jars by 2 inches, as you add your jars the water will rise so don't fill your pot will boiling water, don't ask me how I know this. Boil covered for about 20 minutes if you live above sea level, 30 minutes if you live below sea level. ( I have no idea why this is underlined, I can't seem to fix it, so just ignore it)

Remove jars with your handy little jar grabber and allow them to cool untouched. You'll hear the beautiful clicking of the seals as your jars cool. It's a very satisfying sound. Store your jars in a dark cool place and enjoy these tasty treats all winter long.

Happy Canning!
Erica
you'll need:
Peaches
Canning Jars & lids (I used 12 lb. of peaches and it filled about 9 pint size jars)
Sugar
Water
or pineapple juice
Large Pot or Canning Pot
Something to lift your jars out of the water, they sell specific tools and chances are you know someone who has one.
First thing first is to get your water bath going. I don't have a canner so I used a large pot. Bring your water to a boil and add your jars using this cool little jar picker upper. Let these jars sterilize in the boiling water for about 10 minutes. Add your rings and lids for 5 minutes to not quite boiling water. Make sure you set a timer so you won't forget about them. If you have a dishwasher with a sterilize feature you can simply do this, unfortunately I don't.
 While those are sterilizing wash your peaches and boil another pot of water. Fill an additional bowl with COLD water, I added some ice cubes to make sure it was COLD.
 Drop several peaches into your boiling water for about 30-45 seconds.
 Then use a slotted spoon and add them to the cold water and let sit for about 2 minutes. This process shocks the peaches making them very easy to peel.
 Once you shock the peaches remove the skins. It's very important to let them sit for a few minutes in the cold water. Trust me if you try to peel them before this point you'll have problems. I finally figured this out 8 lbs. into peeling my peaches. The last 4 lbs. went much better. If you want to maximize the entire peach, save the peelings in a little bowl and make some peach honey with them later.
 Once you've peeled your peaches it's time to slice them as you desire. You can half them and remove the pit, slice them, or dice them it's up to you. I sliced them. Then add some lemon juice or Fresh Fruit over your peaches to prevent them from browning. Give it a good stir coating all your peaches.
 Now it's time to prepare your syrup or your juice you will pack your peaches in. Add 6 cups of water and bring it to a boil. Slowly add your sugar and bring to a boil then allow to barely boil for a few minutes, so you'll need to lower your heat.
Next you'll add your peaches to the barely boiling syrup and barely boil for 5 minutes.

Now you're ready to fill your jars. Use a nifty little canning funnel and you'll avoid some spills. Add your peaches to your jars and fill them tightly, leave about 1 inch to 1/2 inch of the jar unfilled. Once you've added your peaches. Make sure to cover them with syrup.
 Next run a knife or the little canning tool along the sides of your jars to release any air bubbles.
Wipe the lip and threads of the jar clean with a wet clean cloth and add your sterilized lids and tighten the ring on the jars.
Add filled and closed jars to a boiling hot water bath. You need enough boiling water to covers the jars by 2 inches, as you add your jars the water will rise so don't fill your pot will boiling water, don't ask me how I know this. Boil covered for about 20 minutes if you live above sea level, 30 minutes if you live below sea level. ( I have no idea why this is underlined, I can't seem to fix it, so just ignore it)

Remove jars with your handy little jar grabber and allow them to cool untouched. You'll hear the beautiful clicking of the seals as your jars cool. It's a very satisfying sound. Store your jars in a dark cool place and enjoy these tasty treats all winter long.

Make sure you check out the Recipe Swap on Friday over at GCC.
Happy Canning!
Erica
Thursday, August 13, 2009
Preserving Summer's Bounty Part 1-Freezer Jam
If you are like me the thought of canning can be a little bit intimidating. It seems like a long process to me, but I decided it was about time I learned how. The equipment can be an investment at first but it's something that can be used for years and years, and many times can be picked up at a garage sale or borrowed from friends when it's time to can.

 2. Combine sugar with the packet of freezer jam fruit pectin.
 3. Crush your fruit. I used a food processor (I'm so in love with this machine) and pulsed it until the fruit was chopped. You'll want some fruit pieces so you don't want to puree it. If you don't have a food processor dice up the fruit and use a potato masher to crush the fruit. I've done this before and it turned out great.
4. You'll want this consistency.

5. Add 4 c. of your crushed strawberries to your pectin/sugar mix.
6. Stir for 3 minutes, making sure you scrap the edges as you stir.
7. Fill your jars using a ladle and leave about 1/2 inch at the top, it will expand in the freezer and you'll need the extra space. (These jars have a fill to here mark.) Leave your jam filled containers on the counter for 30 minutes so jam can thicken up.
8. Then place them in the freezer. This keeps frozen for up to a year, but I don't it lasts that long. It also keeps in the fridge for up to 3 weeks. It's so much better than store bought and once you try it there's no going back. So go ahead give it a try and let me know how it turns out.
For more great recipes check out the recipe swap over at GCC.
FYI these are directions on the back of the package of pectin I wanted to show you it's not as hard as you think it is. The price turned out to be around $1.50 a jar. The next time you make these it will drop to closer to $1.00, since you don't have to add the containers in the price. It's even more economical if you grow your own fruit or are given some from friends or family.
Enjoy!
Erica
This is the first in several attempts at preserving Summer's Bounty. I hope to talk you through each step as we learn together. I'm not a seasoned canning expert but merely a mom showing you it's not as intimidating as we once thought.
This week we'll start with something VERY easy FREEZER JAM!
- You'll need about 4 c. crushed fruit. (I used about 3 lb. fresh strawberries, the package suggest 4 lb. but I had left over strawberries that I just added to our pancakes for dinner.) $3.00
- Freezer Jam Fruit Pectin 1.85
- 1 to 1 1/2 c. Sugar .25
- Containers to freeze in (I used Ball Freezer Jars 2.50)
2. Combine sugar with the packet of freezer jam fruit pectin.3. Crush your fruit. I used a food processor (I'm so in love with this machine) and pulsed it until the fruit was chopped. You'll want some fruit pieces so you don't want to puree it. If you don't have a food processor dice up the fruit and use a potato masher to crush the fruit. I've done this before and it turned out great. 4. You'll want this consistency.
5. Add 4 c. of your crushed strawberries to your pectin/sugar mix.
6. Stir for 3 minutes, making sure you scrap the edges as you stir.
7. Fill your jars using a ladle and leave about 1/2 inch at the top, it will expand in the freezer and you'll need the extra space. (These jars have a fill to here mark.) Leave your jam filled containers on the counter for 30 minutes so jam can thicken up.
8. Then place them in the freezer. This keeps frozen for up to a year, but I don't it lasts that long. It also keeps in the fridge for up to 3 weeks.
It's so much better than store bought and once you try it there's no going back. So go ahead give it a try and let me know how it turns out. For more great recipes check out the recipe swap over at GCC.
FYI these are directions on the back of the package of pectin I wanted to show you it's not as hard as you think it is. The price turned out to be around $1.50 a jar. The next time you make these it will drop to closer to $1.00, since you don't have to add the containers in the price. It's even more economical if you grow your own fruit or are given some from friends or family.
Enjoy!
Erica
Thursday, August 6, 2009
SOOO GOOD!
These were a treat we discovered when we lived overseas, SOUR CREAM ENCHILADAS. Now I'm not going to lie they are sinful filled with enough butter to last you for the month but once you try them I know you'll know it's worth the extra workout.


You'll want this consistency


Ingredients:
2 1/2 lb. cooked chicken chopped or shredded and seasoned with fajita or a little taco seasoning (I used a little bit over 2 c. and it worked fine since I added some black beans)
1 c. butter or margarine
1 c. flour
1 ½ cups milk
2 chicken bouillon cubes, crushed
1 large white onion, chopped
2 c. sour cream
10-12 tortillas
Grated cheese
Salt and pepper to taste
1 green onion, chopped, for garnish
1 c. butter or margarine
1 c. flour
1 ½ cups milk
2 chicken bouillon cubes, crushed
1 large white onion, chopped
2 c. sour cream
10-12 tortillas
Grated cheese
Salt and pepper to taste
1 green onion, chopped, for garnish
1. Prepare chicken with taco or fajita seasoning. (I added some black beans because we had some in the fridge.) And preheat oven to 375 F.
2. Start the sauce by melting butter over medium heat in saucepan. Once melted add flour and stir until smooth.
You'll want this consistency
3. Add milk and crushed bouillon cubes. Give it a good stir until it's nice and incorporated
4. Add chopped white onions. Stir and simmer for a minute or two. (It will start to really thicken up)
5. Remove from heat and stir in sour cream.
6. In tortillas, place desired amount of grated cheese, cooked seasoned chicken, a spoonful of sauce and some salt and pepper.
7. Roll tortillas and place side by side in 9x13 inch pan. After filling tortillas, pour remaining sauce on top of enchiladas. Sprinkle with more grated cheese.
8. Bake at 375 degrees F for about 20 minutes uncovered. When ready to serve sprinkle chopped green onion on top as garnish.
Enjoy!
For more great recipes this week check out the Recipe Swap on Friday over at GCC.
Blessings!
Erica
P.S. Don't forget about my apron giveaway this week. I'll select a winner on Sunday so make sure you enter.
Thursday, July 30, 2009
Recreating with Leftovers
I'm always trying to find new recipes to use up meat or veggies we have remaining from previous meals. Chicken Fried Rice is one of my go to meals when I have chicken and rice leftovers. It's ready in less than 30 minutes, so it's a fast meal to prepare too.
Enough Rice Cooked Rice to feed your family(leftover rice works better than freshly cooked rice for this recipe)
Here's what you do:
1. Cut up your veggies
 2. Heat small amount of oil in skillet and add your veggies. Cook until the onions are translucent and veggies are tender stiring frequently. (When using a variety of veggies it may be necessary to start things at various times. On this day I cooked my carrots first then added zucchini later since it doesn't take as long to cook.)
 3. Once your veggies are tender add your rice, and chicken and a little more oil to coat the rice. Stirring constantly mix together. Meanwhile heat a small pan and scramble a couple of eggs. After you've done this add some soy sauce to your rice. I generally pour it over the rice mixture until I think it's had enough, but you probablly use 1/4 c. or less. Mix this together

4. Add the scrambled eggs and combine well.
 5. Sit down and enjoy this easy tasty meal.
 For more great recipes check out the Recipe Swap over at Grocery Cart Challenge on Friday.
Chicken Fried Rice
Here's what you'll need:Enough Rice Cooked Rice to feed your family(leftover rice works better than freshly cooked rice for this recipe)
- Cooked Chicken ( I usually use around 1 c. add more for a larger family)
- Oil
- Veggies of your choice (Onion, carrots, zucchini, peppers, broccoli all make excellent choices)
- A couple Eggs
- Soy Sauce
Here's what you do:
1. Cut up your veggies
 2. Heat small amount of oil in skillet and add your veggies. Cook until the onions are translucent and veggies are tender stiring frequently. (When using a variety of veggies it may be necessary to start things at various times. On this day I cooked my carrots first then added zucchini later since it doesn't take as long to cook.)
 3. Once your veggies are tender add your rice, and chicken and a little more oil to coat the rice. Stirring constantly mix together. Meanwhile heat a small pan and scramble a couple of eggs. After you've done this add some soy sauce to your rice. I generally pour it over the rice mixture until I think it's had enough, but you probablly use 1/4 c. or less. Mix this together
4. Add the scrambled eggs and combine well.
 5. Sit down and enjoy this easy tasty meal.
 For more great recipes check out the Recipe Swap over at Grocery Cart Challenge on Friday.
Yum!
Erica
Thursday, July 23, 2009
No Bake Desserts
This summer it seems I've been asked to bring a dessert to several different functions. Since I haven't wanted to use my oven much I've been trying to find no bake summer dessert recipes. I've stumbled on some keepers this year.
1. Prepare graham cracker crust. Combine 1 1/2 c. crushed graham crackers, 1/3 c. melted butter & 4 T. Sugar mix together then press in pie plate. Pop in freezer while you prepare your french silk pie.


Enjoy! Check out other great recipes at the Grocery Cart Challenge Recipe Swap this week.
Erica
We've enjoyed the following this summer Reeces Peanut Butter Squares, Homemade Twix Bars, Homemade Thin Mints and French Silk Pie. I highly recommend all of these.
Today I thought I'd share how easy it is to make French Silk Pie, it's finished in about 20 minutes and will wow your guests every time. If you do take this to a picnic I'd suggest you keep some ice packs around the pie to keep it cool.
French Silk Pie
1-8 inch graham cracker pie crust
1/2 c. unsalted butter softened
3/4 c. sugar
2 oz. unsweetened chocolate squares
1 t. vanilla
2 eggs
Cool Whip
Hershey or other Chocolate Bar-room temperature
1. Prepare graham cracker crust. Combine 1 1/2 c. crushed graham crackers, 1/3 c. melted butter & 4 T. Sugar mix together then press in pie plate. Pop in freezer while you prepare your french silk pie.
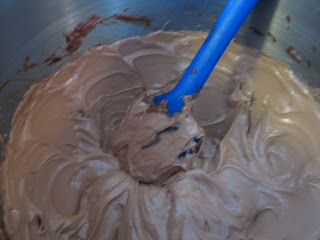
2. Melt Chocolate in microwave on half power, stirring every 30 seconds. Set aside to cool
3. In your mixing bowl combine cream butter then gradually add sugar.
4. Combine Chocolate & vanilla to your butter and sugar mixture. Combine until mixed.
5. Add 1 egg and beat for 5 minutes.
 6. Stop frequently to scrap the edges of your bowl. After 5 minutes add your second egg and continue beating an additional 5 minutes, stopping frequently to scrap the edges of your bowl.

7. Mix until all granules have dissolved.
6. Stop frequently to scrap the edges of your bowl. After 5 minutes add your second egg and continue beating an additional 5 minutes, stopping frequently to scrap the edges of your bowl.7. Mix until all granules have dissolved.
8. Pour & smooth into pie crust and allow to chill for at least 1 hour.
9. Shave your chocolate bar, add cool whip to pie and top with chocolate shavings.
Enjoy! Check out other great recipes at the Grocery Cart Challenge Recipe Swap this week.
Erica
Thursday, July 16, 2009
Easy Crockpot Pulled Pork
 I bought this massive pork shoulder because I had a coupon for $6.00 off any pork product and it was the best price I saw on pork, but unfortunately and had no idea what to do with it. I haven't cooked much pork since it was hard to find where we used to live, but I'm rediscovering the deliciousness of pork once again. Thanks for all your recipes. I look forward to trying some of them in the future.
 I was set to make this into a Mexican dish but unfortunately I remembered I didn't have cheese and in our house that won't fly. I didn't have the car the day I made this and was rushed for time before I had to get to VBS, so I went to plan B, Kalua Pork. I poured in some apple cider vinegar and some apple juice to cover the roast (thanks to the convenience store across the street) and a smidgen of liquid smoke, maybe a teaspoon.
Cooked it on low for about 8 hours. It came right off and shredded beautifully. It's the most meat my toddler has EVER consumed and he ate it plain. I made up some plain brown rice in the rice cooker and by this time I was craving BBQ sauce, so I served the pork over the rice I added some BBQ sauce on top.
 The verdict: Yum and it was excellent on sandwiches tonight. This is such a great recipe and one that is easy to throw together in less than 5 minutes. It gets 5 Stars from us, try it and see how many stars your family would give it.
 For more great recipes check out the Recipe Swap over at Grocery Cart Challenge on Friday.
Enjoy!
Erica
Tuesday, July 14, 2009
Flubbery Fun
I try to add some sort of sensory play with my son every week and I've been putting off making flubber for quite some time and decided to give it a go, since school supplies are very cheap right now. This is so simple to make and your children can even help make it.

 Once it starts to glob together touch it and see if it is sticky. If it sticks to your hand add another 1/8 c. of liquid starch and this time use your hands to squish it together. You'll need to work the mixture till it isn't wet and doesn't stick to your hands.

Enjoy!
Here's what you need:
4 Bottles liquid School Glue (please, please, please to remember to use washable school glue)
Liquid Starch (not the spray kind)
Food coloring if you wish
Bowl
Spoon
Ziplock bag
Pour 2 bottles of glue in a bowl, if you want to add some food coloring do so now. I left mine white because you can also color on it with markers and it turns it an interesting color and is lots of fun.
Next dump in 1/4 c. liquid starch and start mixing it with a spoon until it's combined. It will be very runny, add another bottle of glue to your mixture.
Once it starts to glob together touch it and see if it is sticky. If it sticks to your hand add another 1/8 c. of liquid starch and this time use your hands to squish it together. You'll need to work the mixture till it isn't wet and doesn't stick to your hands.A rule of thumb when making flubber: if it's sticky add some more starch, if it's runny add more glue. (Even though you technically only need three bottles of glue I like to have an extra bottle of glue around just in case I need it.)
That's it. Now the fun begins. My favorite things to do with flubber is to color it or use scissors to practice cutting skills.
Since glue is cheap right now I'm guessing this whole project was $1.00 or less to make one batch. it will keep for several weeks in an airtight ziplock bag, toss it when it gets sticky, or you can always try adding a little more starch. I've never had a problem with this coming out of clothing, as longs as you use Elmer's school glue.
This Sensory goo definitely works for me! Check out other great Ideas at WFMW.
Enjoy!
Erica
Saturday, July 11, 2009
What do I do with this hunk of pork?

I bought this at Dillons a couple weeks ago and it's been taking up a huge space in the freezer. I'm hoping to do something with it this week, but I don't have a clue how I'm going to fix it. I really would like a crockpot recipe for this beast. It's a Pork Shoulder Picnic, and I have no clue what that means. I'd love some ideas, because right now I'm clueless.
Thanks for the Help!
Erica
Friday, July 10, 2009
Manicotti

This is one of my all time favorite meals. Couple this is a nice warm homemade loaf of french bread & a crisp garden salad and I'm a happy girl.
Manicotti

1-8 oz. pkg. Manicotti
1 T. vegetable Oil
1-15 oz. carton part skim Ricotta Cheese or 15 oz. low fat cottage cheese (blend it a bit so it has more of a ricotta texture)
1 c. grated mozzarella cheese
1/3 c. grated Parmesan Cheese
1 t. Salt
¼ t. pepper
1 T. chopped fresh Parsley
2 eggs
2 ½ c. spaghetti sauce
Boil Manicotti according to pkg. Add oil to water. Meanwhile Mix Ricotta Cheese, cottage cheese, mozzarella, and Parmesan cheese, salt, pepper, parsley and eggs.
Drain Manicotti and run cold water over it. After you have drained your manicotti use a knife and make a slit the bottom half of the manicotti shells open.
Place the cheese mixture in the middle of the opened pasta noodle and wrap the pasta back around the cheese forming a tube once again. Place the filled manicotti noodle seam side down in a 3 qt. Casserole dish, and pour sauce around Manicotti.
**Or you can skip the boiling part and fill the uncooked ricotta shells using a spoon and a knife. Add 1 c. water to your sauce and boil it before preparing as the instructions above state. Increase your baking time to 400 degrees. Follow the same baking time as cooked pasta.
Bake in covered and preheated over of 350 degrees for 45 minutes. Uncover and bake for 15 more minutes. Add a little mozzarella cheese on top and enjoy!
And just because I love you so much, here's my make ahead secret:
I like to fill these uncooked shells and put them in the fridge till I'm ready to use them. All that's left is to heat up the sauce with a bit of water. It makes it very easy to throw this meal together when it's time to get it in the oven. Which usually is a needy time of day for my toddler.
For more great recipes check out the Recipe Swap over at Grocery Cart Challenge.
Enjoy!
Erica
Subscribe to:
Posts (Atom)